Our basic punch shield package includes:
- Two sheets of triple layer (5mm) Poplar Plywood >mated with Titebond II (PVA Glue)
- Center reinforcing 4” wide layer of poplar plywood
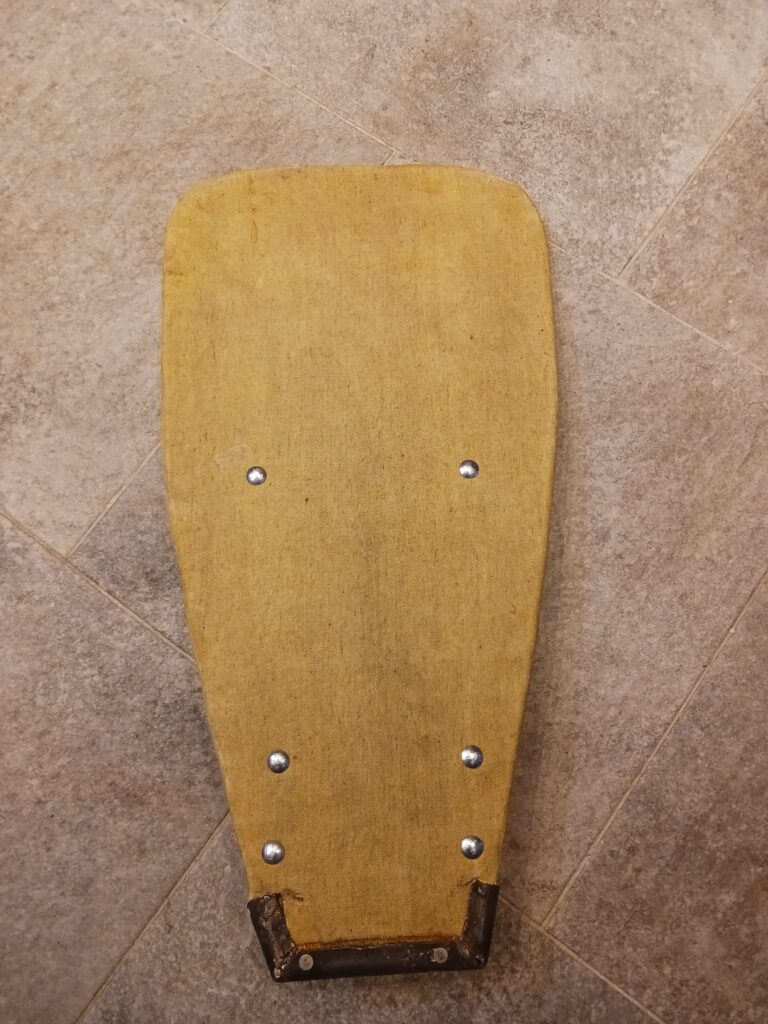
- Glue saturated Canvas outer layer
- 1/16” thick steel punch plate riveted to shield and wrapped 1” up the sides
- 9-10 oz leather punch plate cover
- Leather double strap front grip and adjustable leather rear strap
- Single color paint over Canvas
23” long x 12” wide – how you want it tapered is a discussion we can have. All our shields start as a 23” (or longer) x 12” (or wider) rectangle. We trim to your dimensions from there. Some rule sets are different, but most demand a length of just under 23” and some portion to be just under 12” wide with a minimum of just under 3” at the punch edge (smallest taper).
A third triple layer of Poplar Plywood runs down the internal center of the shield as a reinforcement. It is also mated with Titebond II.
Canvas is bonded to the outer most layer of Ply and wrapped over the edge to cover roughly 1 inch on the rear of the shield. This is done using Titebond II in two steps. The first step adheres the canvas to the wood. The second coat of glue is added after the first coat dries. This fills in all voids, greatly increases the strength of the canvas and makes for an easier to paint surface.
 | 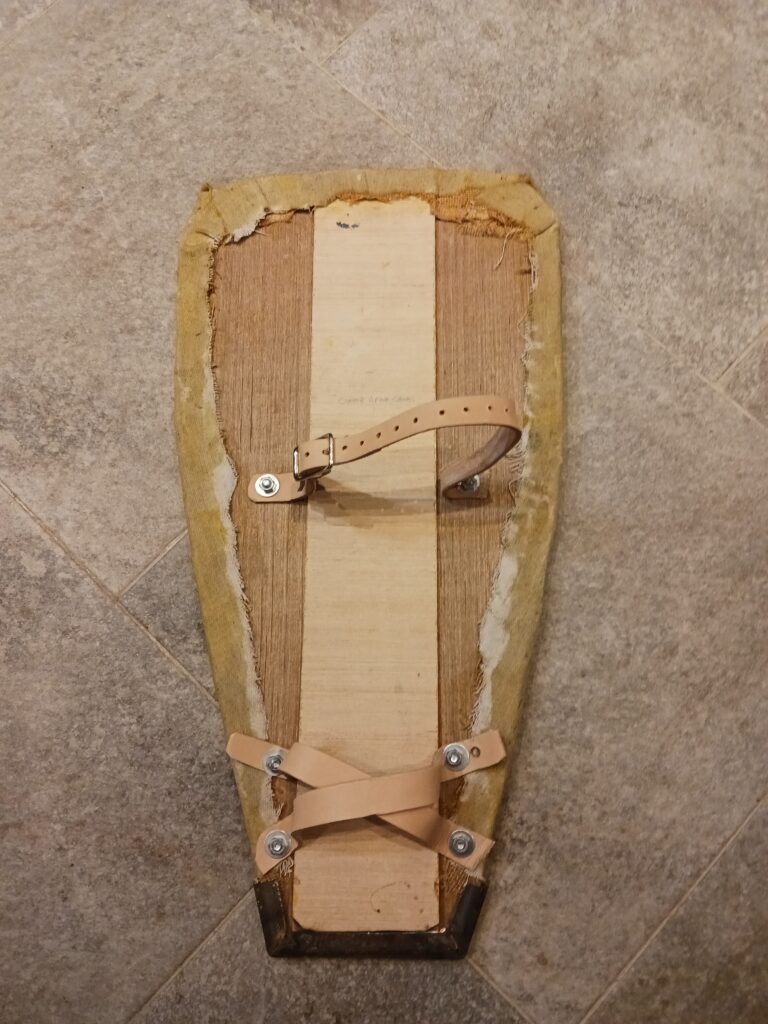 |
Leather straps are secured to the shield using modern carriage bolts (typically ¼”). The excess threading is ground off. The exposed bolt faces are painted as part of the shield design. The rear are painted black per the rule set. Currently, we do not offer rivets, but we can (for an upcharge) if desired.
Our standard is a fixed double strap front grip. (Gauntlet measurements help here). We do place 2 holes in each strap to allow some user adjustment. The rear strap is a two part strap, with a buckle and tons of adjustability. Many people choose to trim the strap once they determine their desired tightness. If you do, leave at least 4” of excess so your strap will stay under the keeper.
Our standard spacing is 4” from the centerline of the grip to the punch edge. That can be moved forward or back if you desire a different configuration.
Our standard spacing from front centerline to rear strap is 9”. This can also be adjusted. To measure this, make a fist while holding a pencil in the fist. Measure from the pencil back. You want to leave AT LEAST 2 inches from the internal elbow crease. If you don’t, you will have trouble with the rear strap interfering with mobility. Read this to mean if you have T-REX arms you may want a 7-8” spacing. If you have LONG forearms, 10-11” might be better. ***note, too short of a spacing makes the shield floppy and gives your grapple opponent better leverage.
 |  |
Options
We can beef up or slim down the basics to your desired shield set up.
Profight optimized – slimmed down
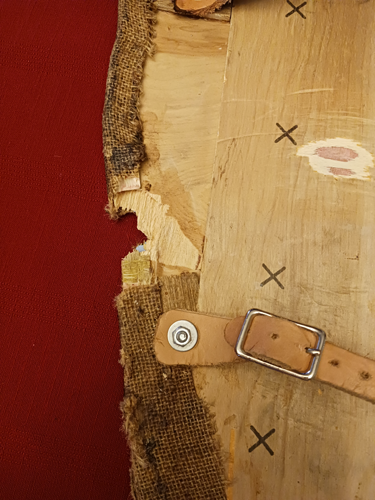
This removes the second full layer of plywood. Instead, you have ONE three ply on the exterior plus a 1” edge reinforcing band and a 3” center reinforcing layer of plywood. This GREATLY reduces both weight and lifespan of the shield.
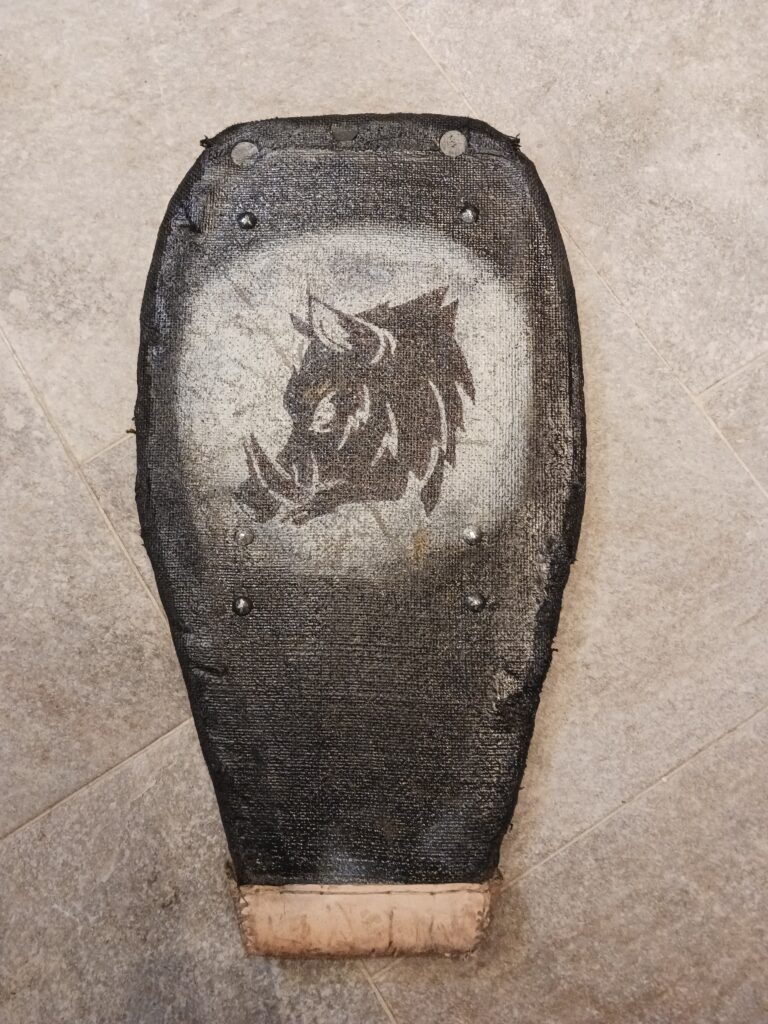
Our typical Profight shield pushes the minimum punch edge dimension at roughly 3” and has a very narrow profile up to the very top, which measures right at the 12” minimum. This cuts weight by 30-50% over our standard design / profile. The greatly reduced weight makes you much quicker both on offense and defense. The much narrower design is also helpful in securing grappling position.
The downside is, you WILL BREAK this shield much sooner than the standard shield. We have you covered there too. The leather front cap, leather straps, steel punch plate and bolts are all reusable. This means you can buy shield decks in bulk, at a much reduced price. Then as you break them on the way to victory, just swap out the durable pieces. My latest Profight optimized shield lasted nine 1 minute sparring rounds, two 2 minute profight (tournament) rounds, a 1 minute sudden death, two more 1 minute sparring rounds before a 360# opponent took a huge chunk out of the side.
The lessons learned. I got five fights with the shield, but I should spar with one of the standard shields and only bring the fast shield when it really counts.
Do NOT EVER use this style of shield in MELEE. A two handed axe will crush it with ONE SOLID BLOW.
 | 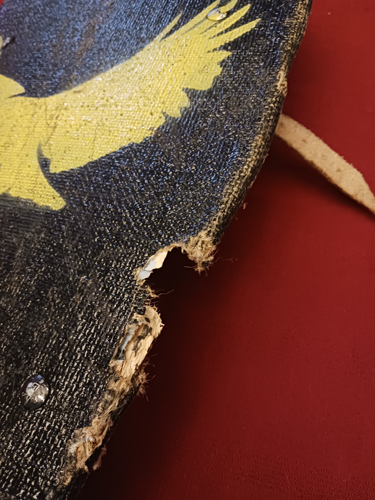 |
Repairable, but shown to show why several decks are sold as a package
Grapple optimized
As mentioned above, we make shields optimized for grappling. This is mostly a function of making the shield have a very narrow taper. The slenderness of the shield makes it simpler to under hook your opponent and to land shield blows while in the clinch. Some fighters prefer the front grip centerline to be just behind the punch edge. This gives greater use of the hand for grabbing and punches landed hit with the shield and the gauntlet. But, it does reduce your range significantly and the narrow profile provides much less protection.
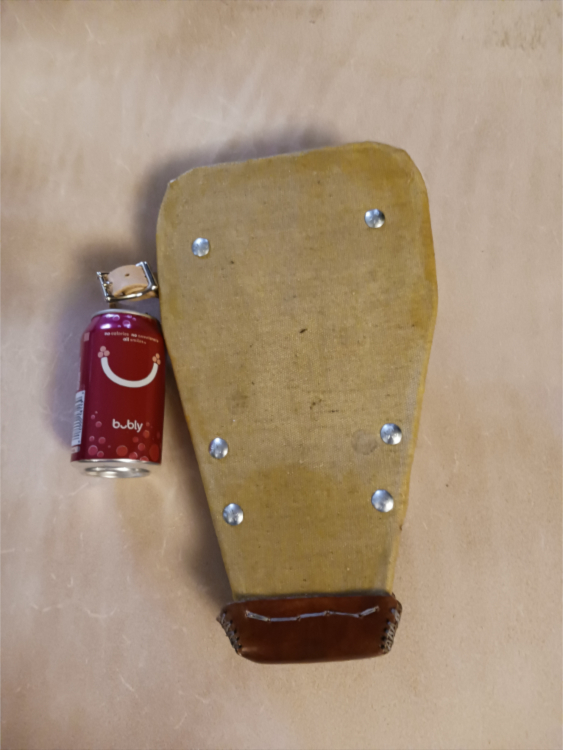
With punch plate protector / unpainted by customer request.
If your fighting style is one of mobility and grapple heavy, this may be a profile that works well for you. It will be lighter than our standard options as well as much easier to grapple with. It can be built very lightly, (see above), using the standard program or even the super durable design.
Super durable
Some people want to buy a shield once and fight with it almost forever. We have you covered. This can be done in any style of shield (except Profight optimized) as it is about construction techniques not shape.
Instead of using Titebond II to bond the two full sized plywood panels, we use epoxy to sandwich in a layer of fiberglass mat. This greatly increases the stiffness and strength of the main panel. The 4” reinforcing panel is also bonded with epoxy and a layer of fiberglass mat, to complete the body.
The external panel has a coarse layer of canvas bonded to it. When the saturation layer dries a layer of tight weave canvas is added and saturation bonded over the coarse layer.
The punch plate is upgraded to 1/8” steel which is wrapped 2” up the shield edges.
The entire perimeter is covered in 9-10 oz leather, which is glued and through stitched.